Well, summer is finally here in Chicago. Not sure how long it will last though, so I figured I would do some pages of summertime fun. The Bo Bunny Barefoot and Bliss line was perfect! It was actually perfect in more ways than one. Bo Bunny has this wonderful abillity to make lines that practically do the layouts for you. Everything in the line comes together so perfectly and effortlessly, and this line was no exception. The colors and prints in this line really have a light breezy summertime feel.
Another thing I like about the Bo Bunny lines is the alphabet 12 x 12 sheet. I love that they include letters, borders, mini title stickers, and something that I love- journal strips. I love to use these when I need to fill in some empty space or to just add that little extra touch. So, if you are looking for something that can give you a layout in very little time that really looks like you spent hours on, then this line is for you!
Wednesday, June 29, 2011
Thursday, June 23, 2011
Tri-Shutter Card Tutorial
We all have them...but what do we really do with them? Last week over on the My Momenta Blog, Christine Meyer showed us an adorable card using patterned paper scraps. I am going to show you another way to use all of those scraps you have been hoarding and waiting to use.
For my card, I used scraps from the Kaleidoscope Super Pad, some textured cardstock from the same pad,vellum message stickers from Emily's Garden and some clear layered stickers from the Free to be Me line. Not only am I showing you how to use your scraps, this card shows how easy it is to mix and match these wonderful lines!
SUPPLIES USED: 12 x 12 Kaleidoscope Super Paper Pad(PA-2329), Free to be Me Clear Layered Stickers (ST-4725), Emily's Garden Vellum Message Stickers (ST-3322)
This card is really simple to create and you will see you will soon be making them all the time....
Now for the steps:
Creating the Card Base
1. Starting with your 12"x12" sheet of cardstock or heavyweight patterned paper. Cut a panel measuring 5-1/2" x 12".
2. Score from top to bottom at the 2", 4", 8" and 10" marks.
3. Fold at the score lines using a mountain, valley, mountain, valley sequence as shown.
4. Smooth the cardstock out again and now put your 12" long side in your trimmer vertically and line it up at the 1-1/4" mark. Carefully put your trimmer blade down at the 2" mark on your plastic guide and cut from there all the way down to the 10" mark. Turn the cardstock over to the other long side and repeat. Your paper should look like this.
5. Now re-fold at the score lines but here's the "key" part. You are going to push the first valley fold outward (only in the center) and the second mountain fold inward. Ta-da! A tri-shutter card base. Close the card and use a bone folder to make the creases crisp.
6. Embellish to your liking.
Thanks for stopping by and I can't wait to see what you created,
Carrie
Monday, June 20, 2011
Father's Day Project...
Over at Momenta our challenge was to create a Father's Day project. I chose to alter this wooden frame I found at Michaels. The guitar was a wooden door hanger that I also altered. I know the picture is a bit old but I really love it and it matched so perfectly with these wonderful Momenta papers!
Products used: PA-2329 Kaleidoscope Super Pad,
PA-1003 Vibrant Textured Cardstock Pad,
ST-2561 Pure Puffy Alphas, ST-2972 Family Ties Puffy Titles
Products used: PA-2329 Kaleidoscope Super Pad,
PA-1003 Vibrant Textured Cardstock Pad,
ST-2561 Pure Puffy Alphas, ST-2972 Family Ties Puffy Titles
Sunday, June 12, 2011
My first Momenta Project...
Hi everyone! I am so excited to show you all my first project! I chose a couple of random photos of my daughter and the puffy title "Sweetie" (which was exactly what I thought of when I looked at these photos). I used these gorgeous printed papers from the Kaleidoscope 12 x 12 Super Pad. There are so many beautifully colored and printed papers in here it was hard to choose so...I used 3 different prints and for the flowers I used another print and cut the big flowers out. You will soon see that I am a big fan of the "fussy" cutting. I hope you enjoyed this layout as much as I enjoyed making it! Can't wait to show you more!
Supplies that I used are: Kaleidoscope 12 x 12 Super Pad...3 x 9 Sweetie Puffy Title
Saturday, June 11, 2011
Momenta has an awesome contest....check it out!
Momenta's Design Your Own Sticker to Win Facebook Contest!
Design Your Own Sticker to Win (Facebook Contest)
Momenta’s Design Your Own Stickers let you create personalized stickers quickly and simply using your own home printer. The creative possibilities are limitless…and now it is your turn to show us what you can do!
Contest entry is easy! Simply upload a photo of a project you created using the Design Your Own Stickers or upload a photo of a custom sticker design you printed to the Design Your Own Stickers to Win Album on Facebook then invite your friends to come “Like” your creation! The photo with the most likes by the end of July will receive a $250 coupon to Momenta.com and $100 cash!
The Design Your Own Stickers can be purchases at Joann’s, through the Momenta.comwebsite, or you can request a free sample of a random design to be mailed to you by sending an email to social@momenta.com!
Thursday, June 2, 2011
I made the team!
I am so excited...I made the Momenta Design Team! I can't wait to get started working with these wonderful products and creative ladies!! Yay!
Wednesday, June 1, 2011
We R Memory Keepers-Yankee Doodles Reveal at A Cherry on Top
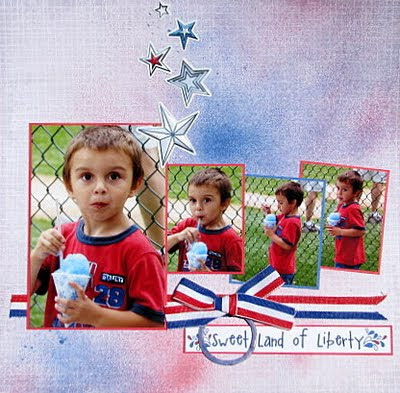
I am one that normally tends to stay away from themed papers, but the Yankee Doodles by We R Memory Keepers really caught my eye. This line is so fun and so versitile I had such an easy time creating with it. What I really liked about it was the fact that all the papers are double sided...one side totally themed and the other a bit more free with endless possibilities. The colors are so vibrant and bold making every page you do really stand out. I had so much fun with this line!
Check out my full reveal at...A Cherry on Top.
Subscribe to:
Posts (Atom)